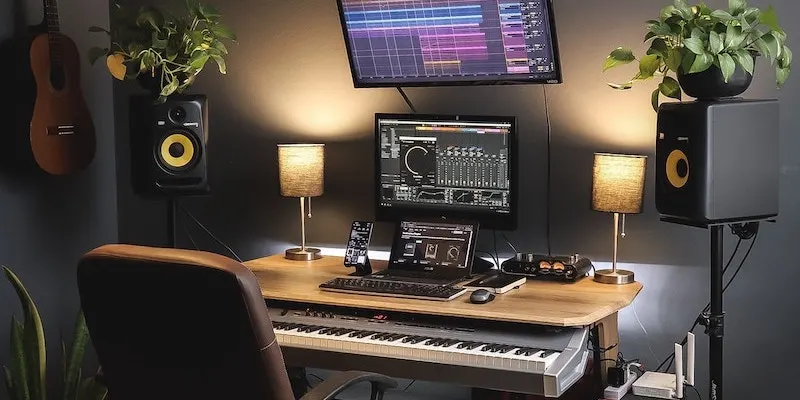
Recording your own music at home has never been more accessible, thanks to advancements in technology and the availability of affordable recording equipment. Whether you’re a singer-songwriter, instrumentalist, or producer, creating high-quality recordings from the comfort of your own space is within reach. In this step-by-step guide, we’ll walk you through the process of setting up a home recording studio and recording your own music.
Step 1: Setting Up Your Home Recording Studio
- Choose a Suitable Space: Select a quiet and well-ventilated room in your home for your recording studio. Consider acoustics and room treatment to minimize reflections and external noise.
- Invest in Essential Equipment: Acquire basic recording equipment such as a computer or laptop, audio interface, microphones, headphones, and studio monitors. Choose equipment that suits your budget and recording needs.
- Set Up Your Audio Interface: Connect your audio interface to your computer via USB or Thunderbolt and configure it with your recording software. Ensure that your audio interface is compatible with your operating system and recording software.
- Arrange Your Microphones: Position microphones strategically to capture the best sound from your instruments and vocals. Experiment with microphone placement to achieve optimal tone and balance.
Step 2: Recording Software and Setup
- Choose Recording Software: Select a digital audio workstation (DAW) that meets your needs and preferences. Popular DAWs include Pro Tools, Logic Pro, Ableton Live, and FL Studio. Install and set up your chosen software on your computer.
- Configure Audio Settings: Configure audio preferences within your recording software, including sample rate, bit depth, input/output routing, and buffer size. Adjust settings to optimize performance and minimize latency.
- Create Tracks and Session Layout: Create separate tracks for each instrument or vocal part within your recording session. Organize your tracks logically and label them accordingly for easy navigation and editing.
- Set Levels and Monitor Mix: Adjust input levels on your audio interface and individual tracks to ensure proper gain staging and prevent clipping. Monitor your mix using headphones or studio monitors to hear playback accurately.
Step 3: Recording Your Music
- Prepare for Recording: Tune your instruments, warm up your voice, and ensure that you’re ready to perform before recording. Consider using a metronome or click track to maintain tempo and timing consistency.
- Record Multiple Takes: Record multiple takes of each instrument or vocal part to capture variations and options for editing. Experiment with different performances and techniques to find the best take for each track.
- Punching In and Editing: Use punch-in recording or editing tools within your DAW to fix mistakes or refine performances. Edit audio regions, cut, copy, paste, and apply effects as needed to enhance your recordings.
- Overdubbing and Layering: Add additional layers and overdubs to enrich your recordings. Experiment with harmonies, instrumental arrangements, and effects to create depth and texture in your music.
Step 4: Mixing and Mastering
- Balance and EQ: Balance the levels of individual tracks and adjust EQ settings to sculpt the frequency spectrum and enhance clarity and definition in your mix.
- Compression and Dynamics: Apply dynamic processing such as compression and limiting to control the dynamic range and add punch and consistency to your mix.
- Reverb and Effects: Experiment with reverb, delay, modulation, and other effects to add spatial depth and ambiance to your mix. Use effects tastefully to enhance the mood and atmosphere of your music.
- Mastering: Master your final mixdown to optimize its overall loudness, tonal balance, and dynamic range. Use mastering plugins or send your mix to a professional mastering engineer for final polishing and preparation for distribution.
Step 5: Sharing Your Music
- Export and Save: Export your final mixdown as a high-quality audio file in a common format such as WAV or AIFF. Save your project files and backups for future reference and editing.
- Distribution and Promotion: Share your music with the world by uploading it to online platforms such as SoundCloud, Bandcamp, Spotify, or YouTube. Promote your music through social media, email newsletters, and live performances to reach a wider audience.
- Collect Feedback and Iterate: Gather feedback from listeners, fellow musicians, and industry professionals to improve your recordings and refine your craft. Use feedback constructively to guide future recording projects and creative endeavors.
Conclusion
Recording your own music at home is a rewarding and empowering process that allows you to express your creativity and share your art with the world. By following these steps and honing your recording skills over time, you can create professional-quality recordings that showcase your talent and vision as a musician.
So, gather your instruments, fire up your recording software, and let the music flow!


